
How To Use PrusaSlicer -A Pro Guide For Beginners
If you’re new to 3D printing, learning how to use PrusaSlicer is one of the most important steps to get high-quality prints. PrusaSlicer is a free and powerful slicing software that prepares your 3D models for printing by converting them into G-code instructions your printer can understand.
In this beginner-friendly guide, we will explain everything step by step, from importing your model and setting up your printer to choosing materials, supports, infill, and exporting your G-code. By the end, you’ll know exactly how to use PrusaSlicer to get reliable prints, whether you’re a hobbyist or a professional.
How to Get Started with PrusaSlicer
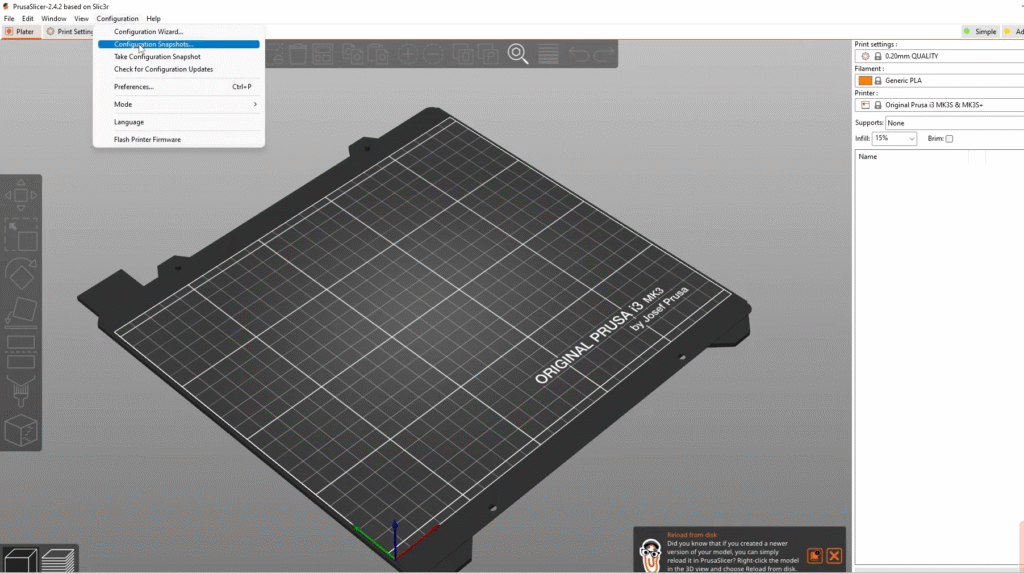
Getting started with PrusaSlicer is easy. First, download and install the latest version of the software. Then, open it and set up your printer using the Configuration Wizard. Once your printer profile is ready, you can import your 3D model and begin adjusting settings like orientation, material, and layer height. In just a few steps, you’ll be ready to slice and export your G-code for printing.
Let’s discuss all the steps in detail, right after you have downloaded and installed your slicer.
Step 1: Import Your Model
To start, bring your 3D model into PrusaSlicer. You can:
- Drag and drop the file into the PrusaSlicer window,
- Click the Add button on the top toolbar, or
- Go to File > Import
PrusaSlicer supports STL, STEP, 3MF, OBJ, and AMF file types.
Step 2: Fix Model Orientation
Sometimes your model might not be facing the right way after you import it. Don’t worry , you can adjust it:
- Use the Rotate tool (R) to turn the model.
- Small guidelines let you rotate in 5° steps.
- Longer guidelines let you rotate in 45° steps.
- Small guidelines let you rotate in 5° steps.
- You can also use the Place on Face tool.
- When you click it, white planes will appear on your model.
- Pick a plane, and PrusaSlicer will snap that side flat onto the print bed.
- When you click it, white planes will appear on your model.
Step 3: Select Your Printer
- If you picked just one printer and nozzle size during setup, PrusaSlicer will already have it ready for you.
- If you added multiple printers, just choose the one you want from the drop-down menu on the right side.
Step 4: Select Your Material
Every material (like PLA, ABS, or PETG) needs its own print settings, things like temperature, speed, and cooling.
The good news is that PrusaSlicer already has ready-made presets for most materials.
- Just open the Material drop-down menu on the right side.
- Pick the material you’re going to print with, and the software will load the best settings automatically.
Step 5: Choose a Print Profile (Layer Height)
The layer height decides how smooth your print looks and how long it takes to finish.
- Thinner layers = better quality, but longer print time.
- Thicker layers = faster prints, but less detail.
PrusaSlicer gives you ready-made print profiles to choose from. For beginners, we recommend starting with 0.15 mm or 0.2 mm; they give great quality and don’t take too long.
Step 6: Add Supports
3D printers build your model layer by layer. If part of your model sticks out in the air (like an arm on a figure), the printer needs extra help; otherwise, it can’t print those “floating” parts.
That’s where supports come in. They’re small, removable structures that hold up your model while it’s printing.
PrusaSlicer can automatically detect and add supports for you.
- In the right panel, choose:
- Supports: Everywhere: adds supports under all overhanging parts.
- Supports: On build plate only: adds supports only from the print bed.
- Supports: Everywhere: adds supports under all overhanging parts.
Example:
- Printing a statue with outstretched arms: choose Everywhere.
- Printing a box with small holes or bridges: On the build plate, only is usually enough.
Step 7: Set the Infill
3D prints are usually not completely solid and not fully hollow either. Instead, the inside is filled with a special pattern called infill.
- Why it’s important:
- Gives strength and support to your model.
- Helps the top layers print smoothly.
- Saves time and material compared to solid prints.
- Gives strength and support to your model.
You can adjust the infill percentage in the right panel.
- Around 15% infill is good for most prints.
Examples:
- Decorative items (like vases or figures): 10–15% is enough.
- Functional parts (like tools or gears): 30% or more for extra strength.
Step 8: Add a Brim (Optional)
Sometimes, prints can warp or lift off the bed, especially if they have a very small base touching the print bed. To prevent this, you can use a brim.
- A brim is like a flat outline printed around the bottom of your model.
- It helps the print stick better to the bed and reduces warping.
You can turn it on by checking the Brim option in the right panel.
Once the print is done, the brim is usually easy to peel off by hand.
Tip: A brim is super helpful for small parts, tall thin prints, or tricky materials like ABS.
Step 9: Preview Your G-code
Before you hit print, it’s always smart to preview your G-code. This allows you to see exactly how your printer builds the model, layer by layer.
- Click “Slice now” > you’ll be taken to Preview Mode automatically.
- You can also switch between 3D view and Preview in the bottom-left corner, or just press the TAB key.
- Use the slider on the right to move through each layer and check how it looks.
What to check:
- The overall shape matches your model.
- No parts are floating in mid-air (if they are, turn on supports).
- The infill and supports look correct.
If everything looks good, click Export G-code and you’re ready to start printing!
Step 10: Exporting the G-code
Once your print is ready, you need to export the G-code so your printer can read it.
- PrusaSlicer will automatically detect if you plug in an SD card or USB drive.
- When detected, you’ll see a new “Export to SD/USB” button next to the normal Export G-code button at the bottom right.
- Clicking it will let you save the file directly to your SD card or USB drive.
- If you have more than one device connected, it will open the folder you last used.
- After saving, you’ll also see an Eject button to safely remove your SD card or USB drive.
Now your G-code is ready to be inserted into the printer, and you can start your 3D print!
Conclusion
Using PrusaSlicer may seem complicated at first, but once you understand the basics, it becomes an easy and powerful tool for 3D printing. From importing your model and adjusting settings like orientation, infill, and supports, to previewing and exporting the final G-code, every step plays a key role in achieving the best results. With practice, you’ll be able to fine-tune your prints and make the most out of your 3D printer. So, download the latest version of PrusaSlicer, follow this guide, and start creating smooth, precise, and professional-quality prints today.
Frequently Asked Questions:
- Is PrusaSlicer easy to use?
Yes, Prusa Slicer is a free slicer software that is easy to use for anyone.
- Is Prusa Slicer better than Cura?
PrusaSlicer offers more advanced features and customization compared to Cura. However, Cura works with more 3D printers out of the box. While PrusaSlicer is mainly designed for Prusa printers, it also supports many others. Cura gets updates more often, but PrusaSlicer still remains a strong choice for detailed control.
- What is the best beginner slicer?
In 2025, Cura is still the most popular slicer for beginners. It lets you show or hide many settings based on your needs. On the other hand, PrusaSlicer and Bambu Studio are built to give the best experience for their own printers.